Thule Euro Classic 929 G6 Bike Carrier
7th Oct 2013
I do love the fact that with billions of brains available every now and again one of them comes up with a new idea that revolutionises a previously saturated area or concept. In the case of bike racks some bright spark clearly came up with the concept of a coupling that would clamp securely onto a standard tow bar hitch with enough strength to then be able to hold not on a hefty bike rack, but a bunch of bikes too. You'd be forgiven for thinking, like I did, that a ball and socket joint, which is effectively what it is, is amongst the less rigid of joints available to mechanics. whatever it is in the new coupling that clamps onto the ball of the tow bar hitch it has literally blown open the market of bike racks. Previously racks had to hang off the rear door, perhaps resting on the bumper for some added support. They were a) fiddly to fit, b) obscured either your number plate and lights or your rear window (or all three in some cases), and most frustratingly, meant that once the bikes were on, you couldn't then access the back door. All in all they meant that taking the bikes with you on a journey was quite a commitment and required a lot of compromises. Result = less likely to take them with you.
It would be unfair to say that Thule have cornered the market of the tow bar mounted rack, but they have certainly done a good job of getting a decent foot in. Somebody will probably tell me that these racks have been around since just after the invention of the tow bar, but if that's the case then I seriously wonder what's resulted in the proliferation of the racks on the roads over the last year or two.
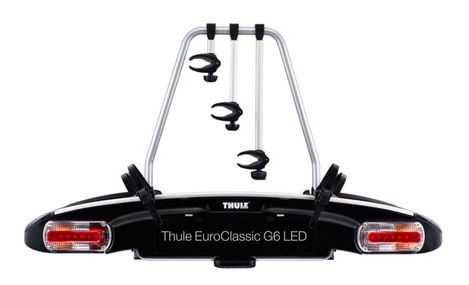
Enough preamble, let's take a look at the GL6.
Putting It Together
This is one of Thule's Deluxe models, capable of carrying 3 adult bikes, and a 4th one if you purchase a separate adapter. It arrived wrapped in bubble wrap and cardboard, and in various smart-lookng parts. Half an hour later I'd managed to decipher the multi-lingual (i.e. pictorial) instructions and had the thing assembled without any spare bits kicking around and without having skinned a knuckle or broken any vital looking plastic bits! It was actually surprisingly straightforward to put together - a sign of the high calibre of design and materials that Thule are renowned for. Fortunately I had a spare number plate (these cost in the region of £10 if you don't have one) which sits securely on the back edge in between the lights; it's a simple job to pop out a couple of plastic inserts, reverse them, and clamp the number plate in place. The basic rack consists of three curved aluminium channels and a folding U-shaped bar. Fold the bar into the upright position and it drops into place and is secured with two heavy duty plastic turn-screws.
Fitting The Rack
OK, so once the bar is fixed in place it's a very simple job to lift the rack in a horizontal position, and drop it into place on the tow ball. When in place you pull the heavy duty clamp handle down to lock the thing in place. The first time you fit it you may need to give the black turn screw on the side of the socket joint a turn or two. Tow balls obviously come in slightly different sizes so this adjustment allows for a snug fit regardless of size. You'll know when it's fitted correctly as the rack has no movement in any direction. If it moves at all, take it off (by lifting the clamp handle) and turn the screw a little more. When it's snug pop in the key (included) and turn a quarter turn. There's even a little diagram to remind you (and potential thieves) that it is unlocked / locked. The last thing to do before loading the bikes is to plug in the electrics. I fell foul of this the first time I put it on as I hadn't realised that there are two different types of socket: 9 pin and 13 pin. The rack comes with a 13pin connector. My car has a 9 pin. A converter costs around £8 on Amazon.
Loading The Bikes.
On the top of the bar (think n shaped, not u!) there are three different length removable clamp-arms that rotate around to grab onto the cross-bar of the three bikes. Place the bikes on the curved troughs and clamp the respective arms to the cross bars. It can be a little tricky weaving the bars through frames etc dependent on what sizes your bikes are and what order they go on in, but I've yet to be stumped with any combination I've tried yet! As you place each bike in the trough and have clamped the arm on the cross bar there are buckled clamps to hold the wheels in place. These can be moved left and right along the trough in case your bike sizes change. They are rather like giant, heavy-duty zip ties, with a satisfying ratchet action to get things nice and tight. Oh, I almost forgot, the clamps that grip the cross bars are also lockable with the same key. When unlocked the turn buckle simply turns without doing up the clamp.
Driving & Accessing the Boot
Once everything's loaded on and secured there really isn't anything more to do. The wheels are within the line of the wing mirrors so there's no need to drive as if on egg shells. Perhaps take a little extra care on tight corners and when manoeuvring in car parks as you are about 3 feet longer than usual! When you stop and want to get into the boot the rack really comes into its own. Just below the number plate there's a rubberised foot pedal. Hold the top of the top bar and press the foot pedal and you can easily tilt the whole thing backwards to allow access to the boot. A couple of heavy duty metal cables stop the things from tilting all the way to the floor and mean that you can let go, walk around the rack and step in to open your door. We have a Skoda Octavia Estate with a fairly high tailgate and there's tonnes of clearance. I can't begin to explain how much I love this feature when compared to the old style racks that meant you had to reach over the back seats if you wanted to et anything from the boot. It's meant that we've had the rack for three weekends now, and used it and got out cycling on all three weekends. Previously we would not have taken our bikes with us. Now that's got to be a good thing!
The Extra Rack
I had foolishly thought that as it was advertised as a 3 to 4 bike carrier this meant it would carry 3 or 4 bikes without modification. I discovered pretty quickly though that the additional bike is carried by means of a fourth curved trough which is available as an optional extra. Once this had arrived it was another half hour job to fit it. This one was actually reasonably complex to follow the instructions, but we got there in the end. It adds a little more weight to the whole package, but is fitted in such a way that it doesn't add much to the overall space that the rack takes up in your shed or garage.
Portability
So once you have finished with it and want to put it away it's a simple operation to fold down the bar, un-hook it from the tow bar and carry it to its storage home. My major complaints are two-fold and both centered on the portability of the thing. Once the bar is folded down it would be sensible if there was a clip to clip it into place so that it doesn't swing back 'up' when you pick the rack up on its end, which you have to do if you want to carry it through a door way or down an alley way to your back garden. I've improvised with a bungee cord, but given the level of detail that’s gone into the manufacturing of the thing it surprises me that they have missed this detail. Of more concern is the portability of the thing. Without the additional bike bar it weighs in at a pretty substantial 20.5kg and it's dimensions are 137cm by 65cm. That makes for a fairly heavy and unwieldy load to carry for any distance. I've fashioned a carrying sling to go over my shoulder which has made it a lot easier, another thing that I feel ought to come with it.
Specs
I've mentioned how it is fairly robust and well made. Well there is a pretty good upside to that, and that's the fact that it will carry bikes up to 25kg each. This means that it will take electric bikes. And if you are concerned about being able to lift a 25kg bike onto and off the rack then there's another optional extra to buy which is a ramp to wheel your bike onto the bar!
Here's the full spec:
Technical specifications
Load capacity Bikes 3(4)
Load capacity (kg) 60 kg
Max bike weight 25 kg
For E-bikes
Length (cm) 137 cm
Width (cm) 65 cm
Weight (kg) 20.5 kg
Fits frame dimensions 22-80 mm
Detachable frame holders
Tiltable with bikes
Locks bike to carrier
Locks carrier to car
One Key System compatible
Fits cars with exterior spare tyre Adapter Required
Fits most bikes with disc brakes
Rear lights
Powerplug 13-pin
TÜV EuroBe approved
Fulfils City Crash norm
Miscellaneous Maximum weight for Adapter 928-1 is 15 kg.
Value
The rack retails at around £480 which I admit is a lot of money for a rack. BUT, if it means you get out on your bikes more then I think that this is a massive plus. In a way it should be seen as a way of upgrading our car to a bigger model without the extra cost and fuel inefficiency (incurred for the majority of time driving without the rack I mean). I'm a complete convert and think that we will only be seeing more of these as people cotton on.